







Home Interior Design Materials: Durability and Upkeep

You're standing in a supplier's shop with two laminate samples that look identical, a contractor waiting for an answer, and no clear reason to pick one board, tile or counter over another. That choice matters more than colour. Pick home interior design materials for the exposure they'll face, and they'll look settled for years. Pick by shade alone, and you'll pay for the same work twice.
Table of Contents
- Why Material Choice Shapes How a Home Ages
- Common Interior Materials at a Glance
- Four Tests That Separate Durable Materials from Short-Lived Ones
- Reading Board Grades and Thickness Labels
- Room-by-Room Material Choices for Humid Kolkata Homes
- Testing Sustainable Claims Against Real Renovation Waste
- Care Routine for Each Material That Keeps It Lasting
- Confirm Your Material Schedule Before Ordering
Why Material Choice Shapes How a Home Ages
Say a Kolkata flat gets new laminate kitchen shutters in March. By the end of one monsoon, the lower edges have swollen, the laminate has lifted near the sink, and two shutters need replacement within two years. The face didn't fail first. Water reached the unsealed edge and the board underneath, and the finish followed.
Every interior sits in two layers. The first is structure: walls, slab and floor substrate. The second is finish: tile, paint, laminate, stone or boards fixed over it. A good finish can't rescue a damp, uneven or weak base.
That base varies widely in India. The 2011 Census housing tables recorded 246.69 million households, with 116.30 million households, or 47%, having floors made from mud, wood, or bamboo. Urban homes have largely moved to concrete, masonry, tile and engineered boards since then, but substrate quality, damp and ventilation still differ from flat to flat.
Judge a material by how it handles water, wear, heat and cleaning, then by whether you can repair it. You'll get a chart by use and upkeep, four durability tests, room picks for humid homes, board labels explained, a waste check for sustainable claims, care intervals and a final schedule. Choose for the room's exposure first, then for the look.
Common Interior Materials at a Glance
Read this chart in three passes. Start with the surface you need to cover, floor, wall, counter, ceiling or joinery. Check moisture tolerance next, because that decides whether it belongs near water. Check maintenance effort last, because that's the work you'll live with.
| Material | Typical use | Typical service life | Moisture tolerance | Maintenance effort |
|---|---|---|---|---|
| Solid hardwood | Floors, staircases, furniture | 20+ years with periodic refinishing | Low; swells in damp rooms | Medium |
| Engineered wood | Living room and bedroom floors | 15-25 years | Low to medium; keep away from wet areas | Low to medium |
| BWP plywood | Cabinet carcasses, sink units, wardrobes | 10-20 years depending on exposure | High when edges are sealed and ventilated | Low |
| MR plywood or MDF | Dry-zone shutters, panels, cabinet fronts | 5-10 years in genuinely dry rooms | Low; edges swell if wet | Low |
| High-pressure laminate | Kitchen shutters, worktops | 10-15 years | Medium; seams need sealing | Low |
| Vitrified tiles | Floors and walls | 20+ years | High | Low |
| Ceramic wall tiles | Kitchen backsplash, bathroom walls | 15-25 years | High; grout needs care | Low |
| Granite | Kitchen counters, flooring | 25+ years | High | Medium; periodic sealing |
| Marble | Vanities, feature walls, flooring | 25+ years with care | High when sealed; stains easily | High |
| Quartz (engineered stone) | Countertops, vanity tops | 15-25 years | High | Low |
| Gypsum board false ceiling | Ceilings, coves, feature lighting | 15-20 years | Low; sags when wet | Low |
| Washable emulsion paint | Walls | 3-5 years before repainting | Low to medium | Low |
| Enamel or PU paint | Doors, grilles, woodwork | 5-8 years before recoating | Medium to high | Low to medium |
| Brass or stainless steel fittings | Taps, handles, hardware | 10-20 years; coating finish varies | High | Low |
| Cement or microcement | Floors, feature walls | 10-20 years when sealed | Medium to high when sealed | Medium |
How to Use the Ranges
These service lives assume normal residential use in Indian conditions. A sealed, ventilated, lightly used surface sits at the top of its range. A damp, unventilated or heavily trafficked one falls below it, sometimes by years.
Say you're choosing a kitchen counter. Quartz gives you 15-25 years, high moisture tolerance and low maintenance. Granite lasts longer on paper but needs periodic sealing. Marble also lasts, yet it stains more readily than granite and asks for regular sealing, so it's a poorer fit where haldi, oil and lemon land daily.
Treat the chart as a shortlist, not a verdict. It narrows fifteen options to two or three sensible ones for a given surface. For any specific product, the supplier's data sheet overrides these typical ranges, so check the grade, thickness and care notes printed for that exact board, tile or slab before you order.
If a material can't pass the moisture column for that room, its colour and price don't matter.
Four Tests That Separate Durable Materials from Short-Lived Ones
A finish works like a raincoat. It's fine until the seams fail. So score every material on the face, the joints and the layer underneath, not on the sample you hold under shop lighting.
The four tests below give you that score.
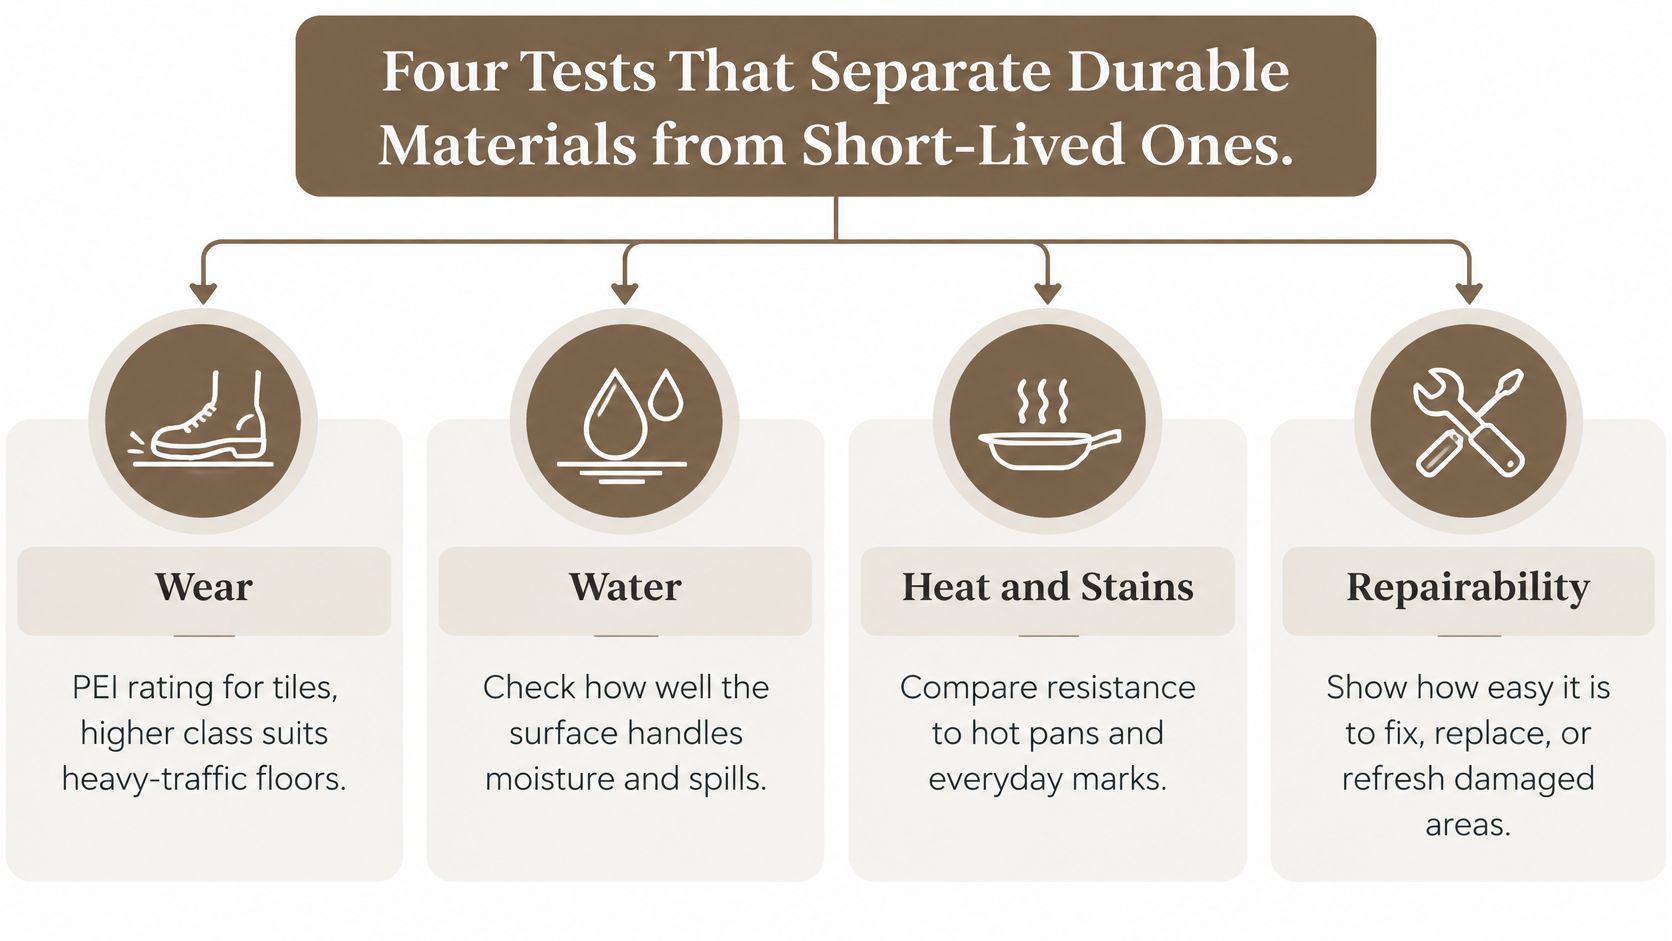
The Four Tests
- Wear: For tiles, ask for the PEI rating. A higher class suits entrances, kitchens and corridors where grit gets ground in. A lower class belongs in bedrooms and on walls, where feet and furniture do less damage.
- Water: Ask how much water the material absorbs. Vitrified tiles absorb very little, which is why they cope with wet mopping and splashes. Porous natural stone drinks in liquid and needs sealing, and unsealed board edges swell.
- Heat and stains: A hot pan set straight on laminate, or acidic liquid left on marble, shows the difference within a week. Ask what happens with a kadai base, a pressure cooker, turmeric and lemon, not just with water.
- Repairability: Ask whether one scratched plank, chipped tile or swollen shutter can be swapped or spot-repaired. If a small failure means tearing out a whole run, the cost is far higher than the rate per square foot.
This short walkthrough shows how those checks play out on real samples.
Substrate check: A tile laid over an uneven or damp slab will crack, sound hollow or lift, however good the tile is. Fix levels and damp before you blame the finish.
Run any product through this list before you buy. Confirm its wear class or hardness, its water absorption or moisture grade, its heat and stain limits, and how a damaged piece gets replaced. If a supplier can't answer one of those four, you don't have a specification yet.
Reading Board Grades and Thickness Labels
Think of board grades as rain ratings. A jacket made for drizzle isn't made for a downpour, and water-resistant isn't waterproof. Most cabinet failures in humid homes start with a board that was rated for a drier room than the one it went into.
Moisture Grade Comes First
The BIS product manual for IS 303:2024 classifies general-purpose plywood into MR (moisture resistant), BWR (boiling-water resistant), and BWP (boiling-water-proof) grades. Use that order as a ladder. MR belongs in dry interiors such as a living room TV panel or a dry bedroom shutter.
Move up the ladder near water. Specify BWR or BWP for sink units, bathroom-adjacent storage, utility areas and low-ventilation zones. Humid monsoon air and cleaning water attack weak adhesive, and you see it as swelling, edge delamination and screws that no longer hold. If you're weighing board options for a sink cabinet, this comparison of HDHMR and BWP plywood for wet-area kitchen cabinets sets out where each one holds up.
Formaldehyde Class Is a Separate Question
The same standard requires the formaldehyde class to be declared as E1 or E2. That's an indoor emissions rating, not a strength rating. It matters most in bedrooms and tightly enclosed cabinetry, where large panel areas sit in still air.
I'd specify E1 for bedrooms, children's rooms and big wardrobe runs. The 2024 revision added formaldehyde content requirements for oven-dry board and introduced steady-state formaldehyde-emission testing as an optional conformity item. For large panel areas with extensive laminate adhesive, ask for that test result rather than accepting a verbal assurance.
Thickness by Job
- 18-19 mm: Heavily loaded modular kitchen and wardrobe carcasses, shelves and sides that carry hardware.
- 6-9 mm: Cabinet backs, drawer bottoms and light drawer parts where loads are small.
- Thicker panels: Only where span, hinge loads or a long unsupported shelf justify the weight and cost.
Don't accept marine or waterproof as a complete specification. A panel can be resistant to moisture yet poorly documented for emissions, and a thick panel can still be the wrong grade. Ask the supplier to record the board standard, grade, thickness, formaldehyde class, BIS licence scope and product marking, batch documentation and intended location.
Seal every exposed edge, keep carcasses off damp floors and leave air behind tall units. Even BWR or BWP plywood fails if a plumbing leak drips into it for months. The grade buys you time, it doesn't replace leak control.
Room-by-Room Material Choices for Humid Kolkata Homes
Location decides the choice. The same board that's sensible in a living room is a poor bet under a sink, and a floor that works on the third floor can fail on a damp ground floor. Ignore any generic waterproof label until you've matched the material to the room.
This selection stage is where most of those calls get made.

| Room or zone | Best choices | Avoid | Why it matters |
|---|---|---|---|
| Kitchen sink and counter zone | Quartz or granite worktop; BWP plywood or stainless steel under the sink | Untreated MDF; solid wood base units | Water and heat exposure; panels need BWR or BWP grade |
| Bathroom walls and floor | Vitrified or ceramic tiles with waterproof grout | Standard gypsum board; natural wood panelling | Steam and standing water; grout must be sealed |
| Bathroom vanity | Quartz or solid surface top; BWP carcass | MDF; laminate over chipboard | Splash and continuous humidity |
| Bathroom ceiling | Moisture-resistant gypsum or PVC-faced board | Standard gypsum board | Sagging and staining after humid days |
| Balcony and utility area | Anti-skid vitrified or porcelain tiles; powder-coated or stainless metal | Engineered wood; carpet | Rain and frequent cleaning water |
| Ground-floor bedroom | Engineered wood or vinyl on a damp-proof base | Solid hardwood on an unbarriered slab | Rising damp from the slab |
| Living room walls | Washable emulsion; breathable textured finish | Vinyl wallpaper on exterior walls | Condensation trapped behind the covering |
| Low-ventilation storage | MR or BWR panels with sealed edges and a rear gap | Unsealed MDF; dense wood without vents | Trapped moisture and swelling |
The Joint Matters More Than the Face
A sealed surface sheds water on its front. Moisture still gets in through joints, cut edges, screw holes and the gap where cabinetry meets a wet wall. That's why a glossy shutter can look perfect while its bottom edge gradually swells. Seal cut-outs around sinks and hobs, edge-band every exposed board edge, and use silicone where a counter meets the backsplash.
Placement does as much work as product choice. Set cabinet carcasses on a set-back plinth so mop water doesn't sit against the board. Leave a small gap behind tall units for air movement, especially on exterior walls. Keep inspection access behind concealed wet-wall fittings, so a leaking trap or valve gets found in days instead of after a whole carcass has rotted.
Bathroom ceilings catch people out. Standard gypsum board sags and stains in steam, so specify a moisture-resistant board there even if the rest of the flat uses regular gypsum. Paint it with a finish meant for humid rooms and keep the exhaust working.
Consider a ground-floor bedroom over an unbarriered slab. Solid hardwood laid directly on it cups and gaps as rising damp moves through. Engineered wood over a damp-proof base has a stable core and a barrier under it, so it lasts. If you're set on a timber look in this climate, these notes on wooden and laminate flooring in Kolkata's humid conditions cover underlay and expansion gaps. The lesson holds across rooms: fix the moisture path, then pick the finish.
Testing Sustainable Claims Against Real Renovation Waste
The greenest material isn't always the one with the highest recycled content. A locally available surface that lasts, can be repaired and comes out intact often beats a labelled eco product that travels far, needs specialist fixing and gets replaced early.
The national picture makes that concrete. A Press Information Bureau release on construction and demolition waste sits within estimates of roughly 150-500 million tonnes of construction and demolition waste annually in India, with reported recycling extremely limited at only about 1% recycled and 34 processing plants across 28 cities by 2024.
Where Renovation Waste Actually Comes From
Most of it isn't mysterious. Offcuts from boards cut without a cutting plan, tiles ordered in the wrong size, and sound layers ripped out with damaged ones make up the heap. Modular dimensions help because standard sheet and tile sizes leave fewer unusable strips. So does ordering after site measurement rather than from a drawing that no longer matches the walls.
Selective replacement helps more. Say a kitchen carcass is sound but the shutters are tired and the worktop is stained. Replacing only the worktop and shutters, and keeping the carcasses and flooring, cuts cost and debris sharply. The same applies to keeping good stone, doors or wardrobe frames and renewing only the worn layer.
Ask for a Material Passport
- Recycled content: What proportion, and is it pre-consumer or post-consumer material?
- Emissions information: Formaldehyde class or VOC data for boards, adhesives and finishes.
- Expected service life: A stated range for this use, not a general promise.
- Repair method: Can one panel, tile or section be replaced on its own?
- Modular dimensions: Do sheet and tile sizes suit your room sizes with little cutting?
- Take-back option: Will the supplier take back offcuts, packaging or the product at end of life?
- Disposal route: Where does it go locally when it's eventually removed?
Ask one question of every claim. What evidence shows this material is better across its whole life? If the answer is only a leaf symbol on a brochure, you don't have evidence yet.
Care Routine for Each Material That Keeps It Lasting
Care has three parts for every material: how you clean it routinely, what you must avoid, and when you reseal, recoat or refinish it. Get those three right and most finishes reach the top of their service range.
| Material | Routine cleaning | Avoid | Reseal, recoat or refinish |
|---|---|---|---|
| Solid or engineered wood | Damp-wipe with a pH-neutral cleaner; wipe spills at once | Steam mops; standing water | Recoat or refinish as the surface wears; check every 2-3 years in busy rooms |
| Laminate | Damp cloth with mild detergent | Abrasive pads; water pooling at seams | No sealing; replace damaged panels and reseal cut edges |
| Vitrified and ceramic tiles | Mop with a neutral cleaner | Harsh acids on polished finishes | No sealing of the tile itself |
| Cementitious grout | Scrub with a soft brush and neutral cleaner | Bleach on coloured grout | Reseal every 1-2 years in bathrooms and kitchens |
| Marble | Wipe spills promptly; use a stone-safe cleaner | Lemon, vinegar and other acids | Reseal every 1-2 years depending on use |
| Granite | Mild soap and water | Acidic cleaners; abrasive scourers | Reseal every 1-3 years; test with a few drops of water |
| Quartz | Mild soap and water | Hot pans placed directly on the surface | No sealing needed |
| Stainless steel and brass | Wipe dry with a microfibre cloth | Chloride cleaners; steel wool | Check coating condition; lacquered brass may need re-coating |
| Emulsion paint | Dust regularly; damp-wipe lightly | Scrubbing hard | Touch up yearly; repaint every 3-5 years in damp-prone walls |
| Gypsum ceiling | Dust with a soft brush | Leaving leak stains untreated | Repaint with breathable paint after any repair |
Exceptions That Cause Most Damage
Wiping spills promptly and using a pH-neutral cleaner protects most finishes. The damage usually comes from a strong product used with good intentions. Lemon and vinegar etch marble and dull granite sealers. Bleach-based cleaners fade coloured grout, and abrasive pads scratch laminate and lacquered brass permanently.
Heat is the other quiet culprit. A hot pan set straight on quartz or laminate can discolour or crack the surface in seconds. Use a trivet every time, not only for heavy kadais.
Grout is the weak point of most bathrooms and kitchens. The tile beside it may be nearly waterproof, but an unsealed grout line darkens, holds moisture and lets water behind the tiling. These guidelines on bathroom tile grout resealing frequency in Kolkata humidity explain how to judge when a line needs attention.
Annual check: Inspect grout and silicone joints, look for swelling at panel edges, touch up paint and clear drains once a year, ideally before the monsoon.
Act fast after any leak. A stain blooming on a gypsum ceiling or a musty smell inside a sink unit means water is already in the layers. Repair the source first, dry the area and then fix the finish.
Confirm Your Material Schedule Before Ordering
The decision to take now is a written material schedule, not a mood board. For every room it lists surface, material, board grade and thickness, formaldehyde class, finish and maintenance interval. Deciding finishes room by room during construction is where budgets balloon by 20-30%, so lock the schedule first.
- List exposure: Note each room's water, sun and ventilation conditions.
- Choose by surface: Pick materials using the room table, one line per surface.
- Check documents: Compare the supplier's specification sheet, grade, thickness and BIS licence scope against your schedule.
- Lock before civil work: Fix finishes before civil and electrical work starts, so drain positions, wall chases and inspection access suit the chosen materials.
If you're working remotely, we ask for a plot survey or unit floor plan with dimensions, photographs of the site from all four sides and of each room, separate budget ranges for construction and interiors, family composition and daily routines, and contact details for your local architect, structural consultant or contractor. With that in hand, we can review your completed schedule against these steps before any order is placed.
If your material list still has gaps on board grade, moisture tolerance or upkeep, we'll review it room by room and turn it into a schedule your contractor and suppliers can price without guesswork. Studio Contour handles material selection and sourcing as part of residential interior design across Kolkata and remotely in other Indian cities. Visit Studio Contour to share your floor plan and start that review before you order.