






7 Modern Arch Design for Kitchen: Shape and Proportion
You're planning a compact kitchen renovation, but the wall between cooking and dining can't disappear. The doorway feels narrow, the overhead cabinets already compete for space, and you'd like a softer opening without sacrificing storage. An arch could work, provided its shape fits the room rather than forcing the kitchen to fit the curve.
Shape, finish and proportion decide the result. A full semicircle needs different headroom from a shallow segmented arch. A painted recess needs different moisture protection from a tiled backsplash, while an opening near the hob needs careful coordination with extraction and cleaning access.
Choosing a modern arch design for kitchen spaces also means deciding what the curve should do. It might frame the dining area, conceal a pantry, organise an appliance station or introduce a curved detail without touching the walls.
For Kolkata homes, humidity and building permissions belong in that decision from the beginning. Don't approve a curve from a front-view sketch alone. Check it against the floor plan, appliance doors, ceiling services and the surfaces you'll need to wipe down after cooking.
Table of Contents
- 1. Full Semicircular Arched Opening Between Kitchen and Dining
- 2. Elliptical or Segmented Arch Opening
- 3. Pointed (Gothic-Inspired) Arch Partition
- 4. Arched Recessed Niche for Shelving or Appliances
- 5. Arched Range Hood Surround and Cooking Alcove
- 6. Arched Pantry or Storage Door Frame
- 7. Arched Backsplash and Tile Panel
- How the Seven Modern Arch Designs Compare
- Choosing the Right Arch for Your Kitchen Layout
1. Full Semicircular Arched Opening Between Kitchen and Dining
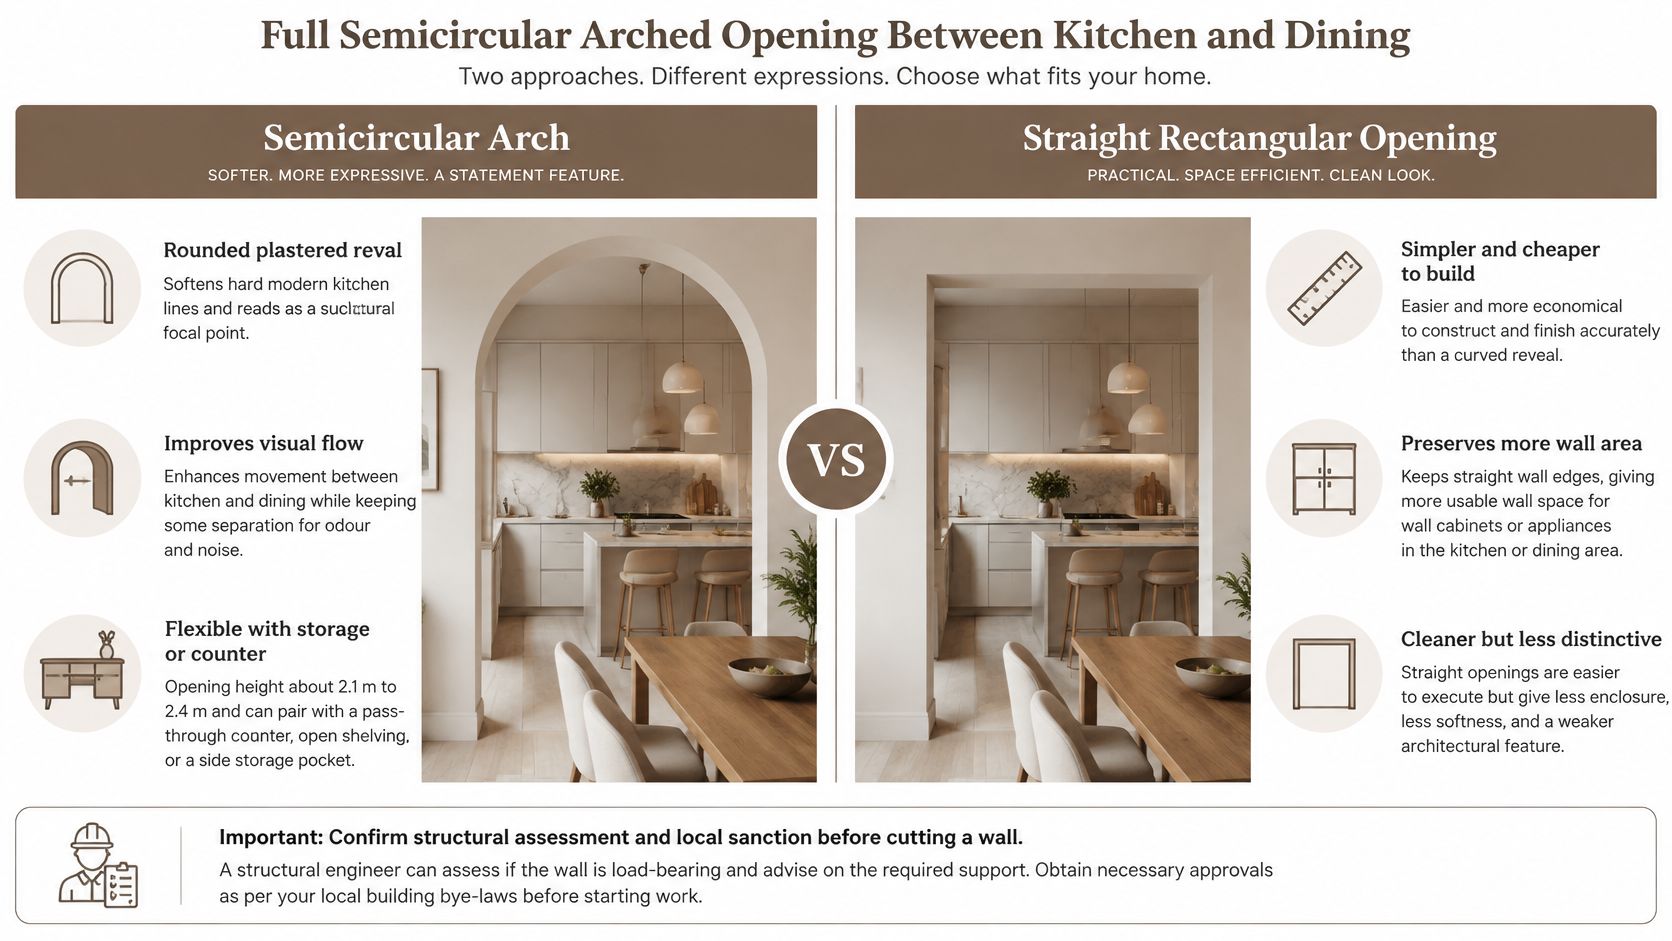
A full semicircular opening gives the kitchen a clear boundary without fitting a door. It works best when there's enough height above the passage for the rounded crown to look deliberate, rather than squeezed beneath the ceiling.
Consider an apartment where the dining table faces the kitchen entrance. Centring the arch on that view can create a balanced composition, but the clear walking route matters more than perfect symmetry. Don't shift the opening towards a refrigerator or obstruct a useful corner cabinet just to centre it on furniture.
Compare the curved shoulders with a straight opening before committing.
Resolve the wall before the finish
Have a structural engineer establish the wall's role and specify any required support. A decorative curve isn't a substitute for a designed lintel, and a wall shouldn't be assumed removable because it sounds hollow. Confirm the applicable sanction requirements with the local building authority and obtain building-management consent where relevant before cutting.
Use a full-size template or accurately formed framework to keep both faces consistent. In Kolkata, resolve damp patches before applying a compatible moisture-resistant plaster and washable coating; a specialist finish won't repair an unresolved leak.
Practical rule: Keep the semicircle only if the improved view and connection justify the wall space you lose.
The video provides another visual reference for assessing the opening's relationship with the surrounding room.
2. Elliptical or Segmented Arch Opening
A shallow arch is often the better choice beneath a low ceiling. A segmented arch uses a flatter circular curve, while an ellipse produces a different, gradually changing profile. They can look similar in a small sketch, so approve the actual outline rather than just the name.
Say a wide opening connects a galley kitchen to the living room. A full semicircle would extend too far down the sides, but a shallow curve could preserve more usable height while softening the opening. Keep its surrounding wall band restrained so it doesn't resemble a heavy beam.
This sketch shows how a curved entry can sit within a wider kitchen and living-room composition.
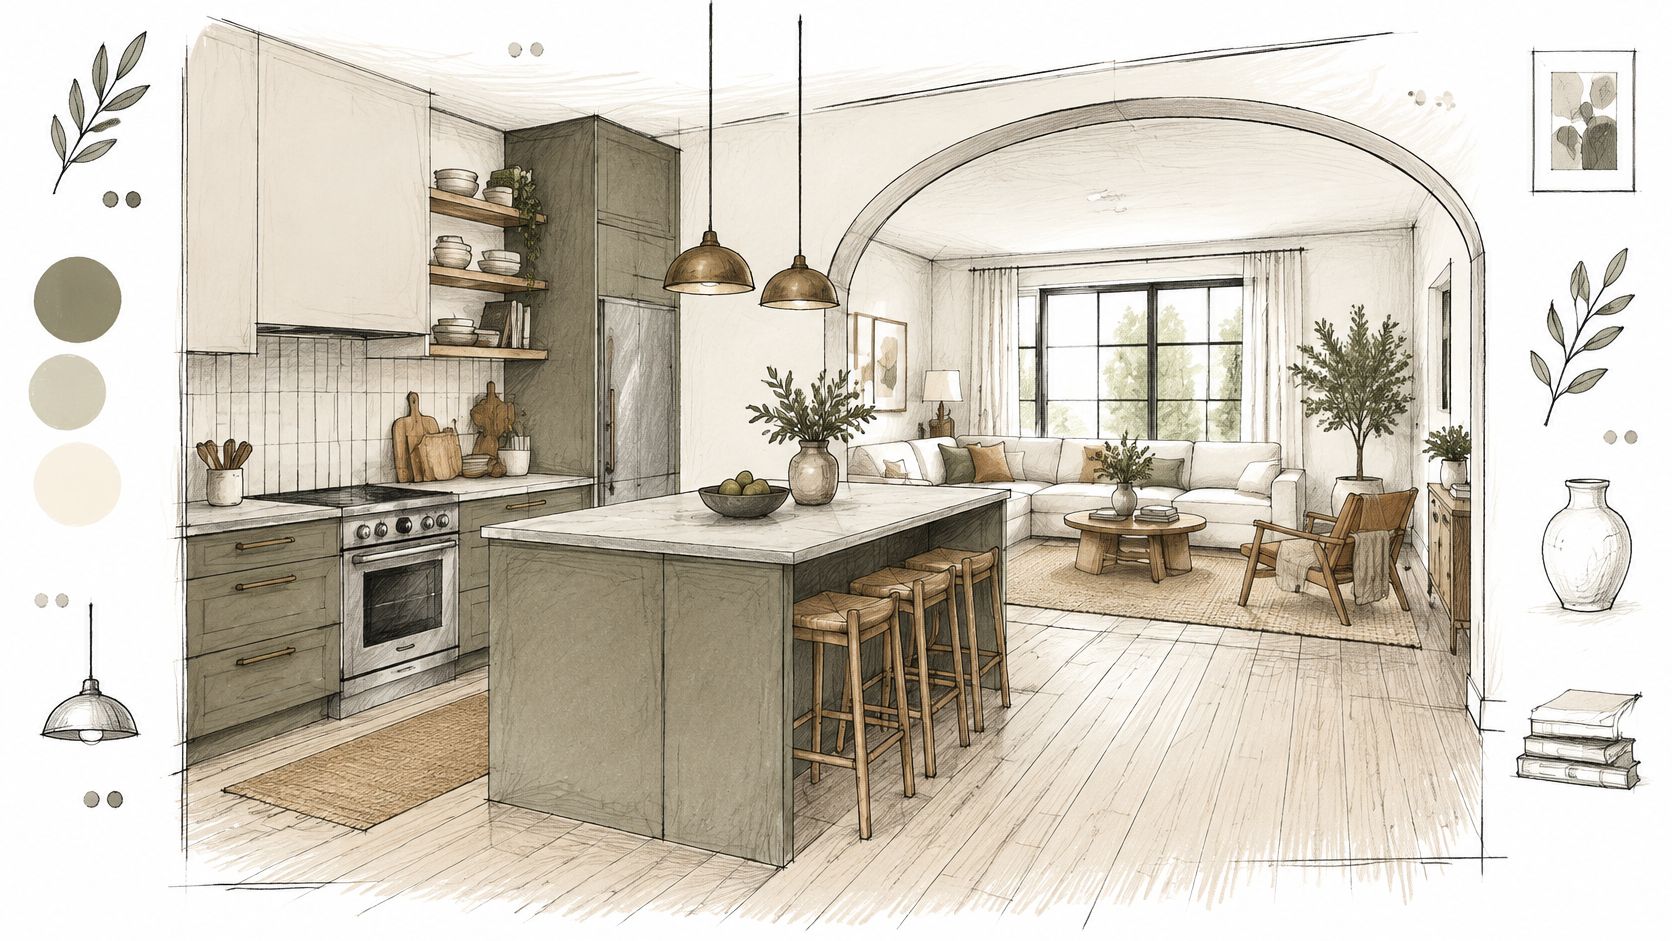
Space planning deserves priority over the profile. Mordor Intelligence's India modular-kitchen market analysis reports that L-shaped kitchens accounted for 57.23% of installations in 2025, making compact corner layouts a relevant context for assessing lost wall and cabinet space.
Check the curve in plan and elevation
- Trace the opening: Mark the proposed shoulders and crown on the wall with a template. Check the view from both rooms.
- Open the appliances: Plot refrigerator doors, oven doors and pull-out storage before fixing the opening's position.
- Protect cabinet junctions: Leave a deliberate filler or finished end panel where rectangular cabinetry meets curved construction.
- Detail lighting access: If you add an LED strip, make its channel cleanable and its driver accessible.
Use plywood or MDF for the construction template, not as an unprotected permanent lining near moisture. A plain washable soffit is usually more practical than a deep illuminated groove that collects grease.
3. Pointed (Gothic-Inspired) Arch Partition
A pointed arch draws attention upwards. That makes it useful in a taller kitchen, but potentially awkward in a low room where the apex nearly touches a ceiling cove. The point needs breathing room, and the cabinetry beneath it should remain simple.
For a larger kitchen facing a living area, a slim pointed frame can define the cooking zone without ornate mouldings. Choose a restrained wall colour and flat cabinet fronts so the opening remains the main feature. Repeating pointed shapes across cabinet doors, shelves and ceiling details usually makes the room unnecessarily busy.
Treat it as a partition, not smoke control
An open pointed arch won't contain cooking fumes. If you regularly fry or temper spices, decide whether you need a closable glazed partition as well as effective extraction. Studio Contour's guide to semi-open kitchen partitions that keep smoke out and light in is relevant when comparing an open frame with a closable boundary.
For a new non-load-bearing partition, lightweight framing can avoid unnecessary masonry bulk. Specify suitable board, reinforcement and joint treatment, particularly around the apex, rather than relying on filler to hide an uneven curve.
A pointed arch can make a room feel taller. It cannot create more clearance where people walk.
For accessibility planning, the National Institute of Urban Affairs guidance recommends 1,500 mm manoeuvring space between kitchen counters and opposite walls, alongside features such as clear knee space and rounded or chamfered slab edges. Assess those needs independently of the arch's appearance.
Finish the partition with a washable matte or satin coating. Avoid projecting trim at shoulder height, and check that nearby switches remain visible and easy to reach.
4. Arched Recessed Niche for Shelving or Appliances
An arched niche suits a kitchen that needs a curved detail but can't afford to lose doorway width. It can frame a coffee station, open shelving or an appliance bay while leaving the main circulation unchanged. The useful part should stay rectangular, with the curve above it.
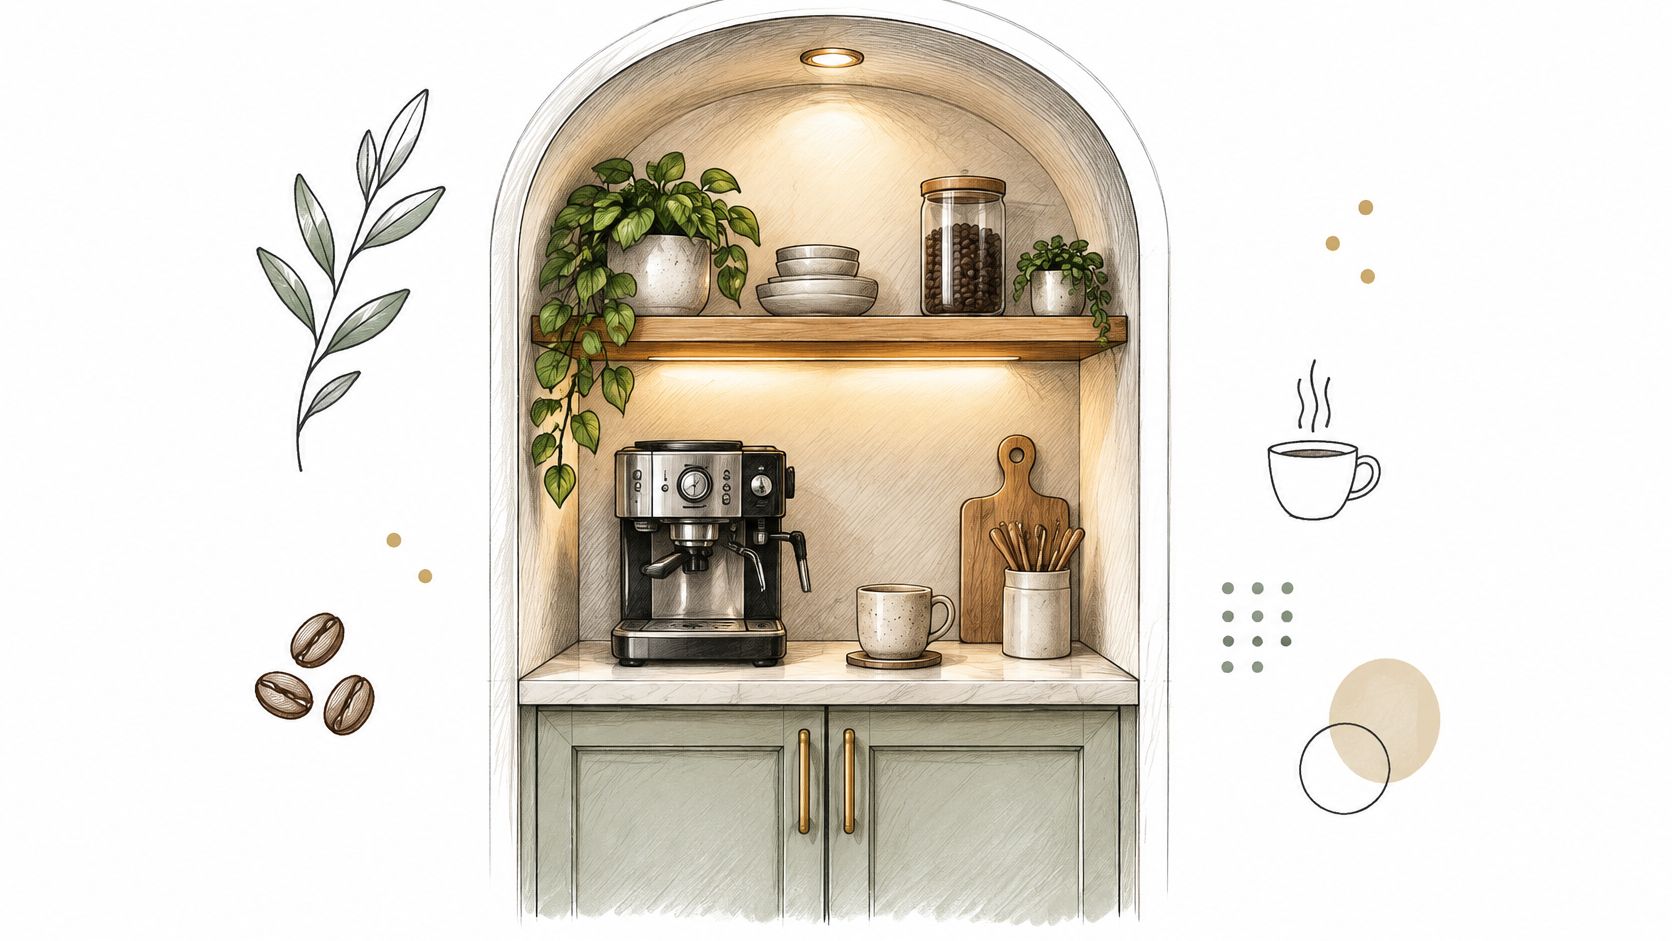
For example, place a coffee machine on a practical work surface, store cups on an accessible shelf and use the arched top as the visual frame. Don't lower the curve until it obstructs the machine's water tank or makes it difficult to lift out.
This alcove illustrates the relationship between the appliance, shelf and curved surround.
Design around the appliance model
- Ventilation: Follow the appliance manufacturer's installation clearances. A token gap behind a microwave isn't a reliable ventilation strategy.
- Electrical access: Keep the socket and isolator reachable without dismantling the niche. Route cables away from hot surfaces.
- Cleaning: Use a washable lining and avoid unfinished timber edges beside steam-producing appliances.
- Structure: Don't chase a deep recess into an existing wall until its construction and structural role have been checked.
A shallow false-wall niche may be more sensible than cutting into masonry, although it takes floor or counter depth. Draw that loss before approving it.
An India-focused ergonomic study of contemporary and traditional domestic kitchens, using Rapid Upper Limb Assessment, identified a gap between adopting ergonomic equipment and applying ergonomic techniques. For a niche, the practical lesson is straightforward: keep frequently used cups and heavy appliances within comfortable reach, not wherever they best complete the arch.
5. Arched Range Hood Surround and Cooking Alcove
Start with the hood, not the arch. Select the extraction equipment and establish the duct route before drawing a decorative surround. Otherwise, the finished curve may obstruct filters, restrict the capture area or leave nowhere to service the appliance.
An arched surround can work well on a long kitchen wall where the hob needs a clear centre. For instance, straight storage units can flank a curved cooking alcove, with the arch aligning to the hob and hood rather than to the entire wall. Keep enough usable counter beside the cooking zone for utensils and hot cookware.
The visual trade-off is bulk. A deep surround can feel substantial from the dining room but oppressive when you're standing at the hob.
Make the interior easy to service
Use a non-combustible lining and a finish approved for the expected heat and grease exposure. Porcelain can be appropriate, but the complete assembly, including adhesive, substrate and joints, needs the right specification. Don't assume quartz or decorative sealed plaster is suitable close to heat without checking the product's limitations.
- Preserve clearances: Follow the hob and hood manufacturers' requirements throughout the curved enclosure.
- Keep filters removable: Demonstrate the removal path on the drawing before construction.
- Provide repair access: Make duct connections, wiring and service panels reachable.
- Simplify the exhaust route: Avoid unnecessary bends and coordinate the discharge location with building requirements.
Maintenance test: If cleaning the hood requires breaking the decorative surround, redesign the surround.
In Kolkata's humid conditions, cooking moisture needs a functioning exhaust route, not just a concealed chimney. Keep the alcove's inner surfaces smooth and washable, and avoid ledges where oily dust can settle. A restrained curve with accessible equipment is more useful than an elaborate enclosure you can't maintain.
6. Arched Pantry or Storage Door Frame
A pantry arch can hide visual clutter without changing the kitchen's working layout. The most practical version often combines a rectangular door with an arched outer frame, rather than requiring a custom curved door leaf. That distinction affects hardware, sealing and future repairs.
Say a narrow utility pantry opens beside the refrigerator. A hinged door could clash with the refrigerator door, while a surface slider could occupy wall space needed for switches or storage. A pocket door avoids those conflicts only if the adjacent wall can accommodate its cavity without interfering with services.
Choose the mechanism before drawing the frame
A true arched door needs hardware and joinery designed for its shape and weight. A rectangular sliding panel behind a decorative arch needs enough overlap to close the opening properly. Check the closed view as carefully as the open view, particularly at the curved crown.
For the storage arrangement behind it, consider pantry and dry-store planning for a Salt Lake kitchen. Shelf depth, access and ventilation should be settled before the doorway becomes a decorative feature.
- Protect panel edges: Specify moisture-resistant materials with sealed cut edges and finished faces.
- Allow ventilation: Don't create a tightly enclosed cupboard around damp cleaning equipment or heat-producing appliances.
- Keep tracks accessible: Choose a sliding mechanism that can be cleaned and serviced without removing the arch.
- Match the wall finish: A quiet frame helps the pantry recede rather than competing with the main kitchen entrance.
For a separate reference on bespoke casing and joinery, RMK Contractors trim work services provides a relevant trim-work example. Keep the local specification focused on humidity, fixing methods and repair access rather than copying a decorative profile without checking its construction.
7. Arched Backsplash and Tile Panel
An arched backsplash gives you the curve without changing the opening, ceiling or circulation. It's a useful option when the existing layout works and the wall needs a clearer focal point. Keep continuous splash protection where water and grease land, even if the decorative outline rises into an arch.
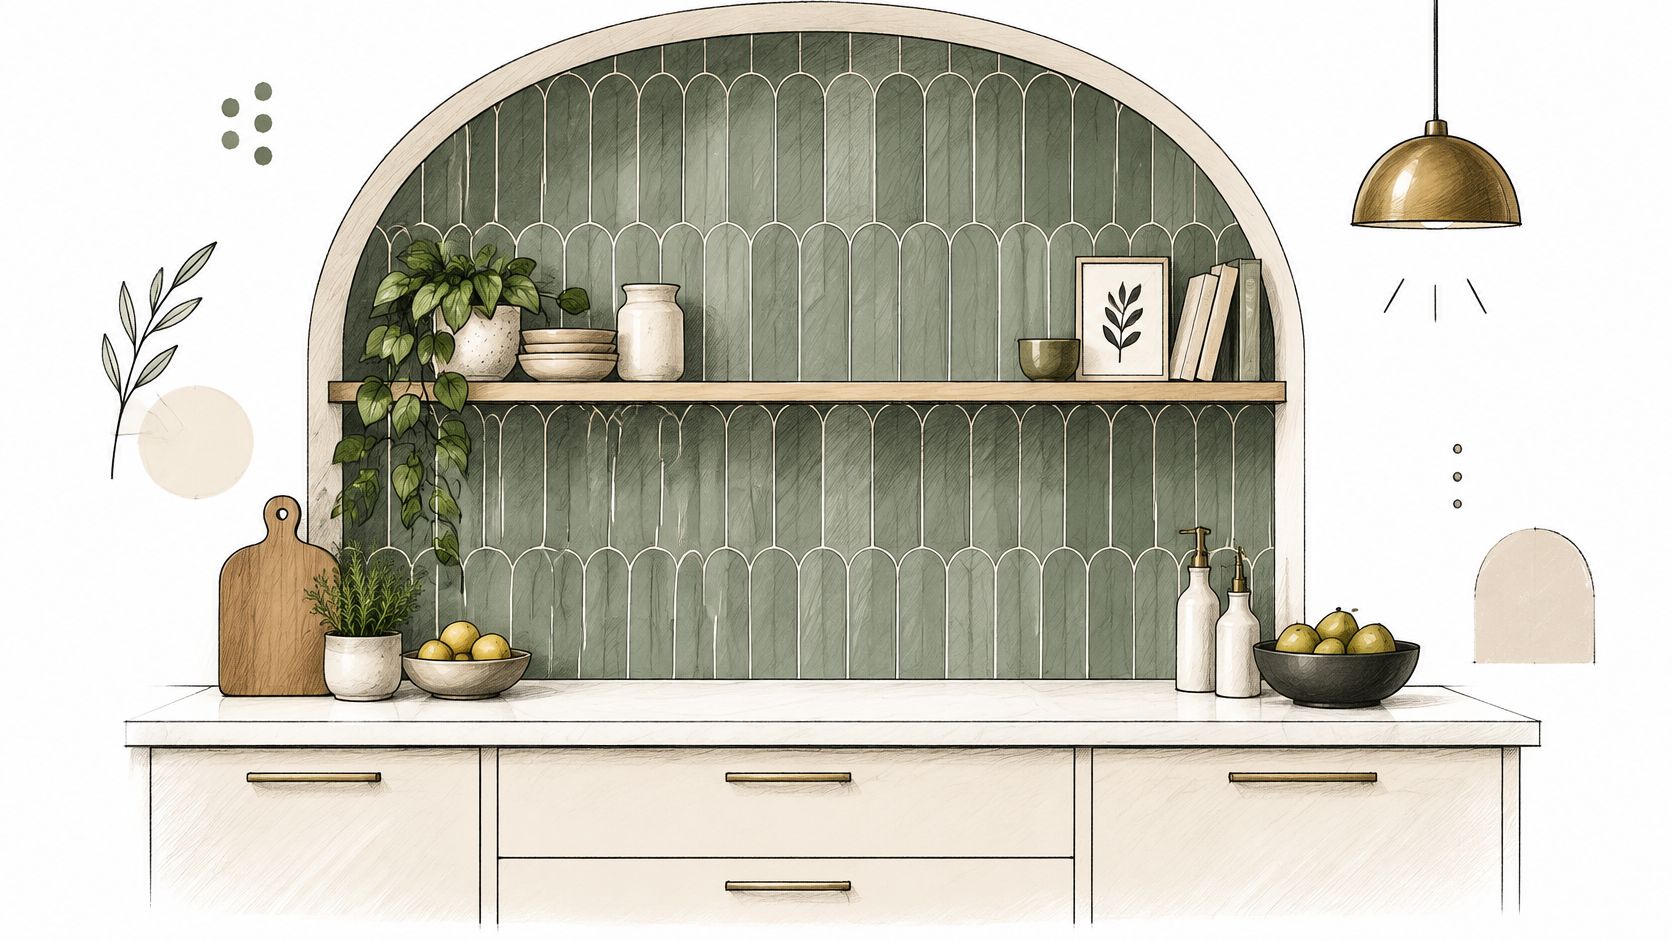
For example, a single arched porcelain panel can sit behind a sink, with a simpler tiled band continuing along the counter. The arch should relate to the sink or tap centreline, while its outer edges remain clear of awkward socket cuts.
This illustration shows how a curved tile field can sit above a straight worktop.
Detail the edge before ordering tiles
Large-format material produces fewer joints but requires careful templating and curved cutting. Small tiles follow the curve more easily, although they introduce more grout to clean. Compare those choices with full-height backsplash ideas for New Town apartment kitchens before deciding how far the feature should extend.
Specify glazed tile or suitable porcelain, a compatible adhesive and grout suited to the location. Seal cementitious grout where its manufacturer recommends it, and use a flexible sealant at the worktop junction rather than rigid grout. Keep matching spare tiles for repairs.
Painting existing tiles is a different approach from replacing them. The guide to painting kitchen tiles in Dublin offers a refurbishment reference, but coating suitability still depends on the existing glaze, surface preparation and exposure to heat or splashes.
Avoid a rough plaster finish immediately behind the hob. A curve that looks good when dry should still be practical after oil splashes and daily wiping.
How the Seven Modern Arch Designs Compare
| Item | Best For | Typical Size or Height | Structural Work | Main Trade-off |
|---|---|---|---|---|
| Full Semicircular Arched Opening Between Kitchen and Dining | Open-plan homes that need connection without full exposure | Opening height: about 2.1 to 2.4 m | Wall cutting may need structural assessment | Curved finishing costs more and reduces wall space for cabinets or appliances |
| Elliptical or Segmented Arch Opening | Compact apartments and renovations with limited ceiling height | Often wider than 1.2 m; shallow rise | Requires careful layout and a template for accurate shaping | Less dramatic than a full arch and can be difficult to execute precisely |
| Pointed (Gothic-Inspired) Arch Partition | Bold, design-led homes with high ceilings and a feature-wall intent | No typical size specified | Can use a lightweight partition to avoid load-bearing wall changes | Complex, strongly stylistic geometry may clash with other interiors |
| Arched Recessed Niche for Shelving or Appliances | Renovations and compact kitchens needing functional storage | Typically 60 to 90 cm wide | Usually avoids major structural work; electrical and ventilation planning needed | Limited recess depth; appliances need ventilation |
| Arched Range Hood Surround and Cooking Alcove | Kitchens with a central hob and concealed ventilation | No typical size specified | Requires coordinated ducting and fire-safety clearances | Curved surfaces need regular cleaning and may limit future hood replacements |
| Arched Pantry or Storage Door Frame | Apartments and renovations needing concealed, integrated storage | No typical size specified | Usually a framed opening; custom door fabrication may be needed | Custom curved doors can cost more and reduce wall space for cabinets |
| Arched Backsplash and Tile Panel | Existing kitchens needing a visual upgrade without structural work | No typical size specified | Surface work only; no structural changes | Curved cuts add labour and waste, while grout needs proper sealing |
Choosing the Right Arch for Your Kitchen Layout
Start by measuring the ceiling height, opening width and wall thickness. Record the positions of beams, plumbing, electrical routes, exhaust ducts and existing cabinets as well. Those constraints will tell you whether the curve should become an opening, a shallow frame or a surface detail.
A full semicircle generally needs generous height and an uncluttered surrounding wall. A segmented arch is easier to accommodate beneath a lower ceiling, while a niche or backsplash panel can introduce the same visual language without changing the passage. Choose a pointed opening only where its apex has enough space and the room can support a stronger feature.
Judge the everyday movements
Don't let the arch dictate the worktop height or interrupt the route between preparation, washing and cooking. An Indian study of kitchen workspace demands reports that conventional countertop heights of 85 to 91 cm may exceed users' elbow height by 6 to 10 cm. Treat worktop levels as a user-specific decision, particularly where seated preparation or reduced mobility needs to be accommodated.
Test the proposed layout with appliance doors open and dining chairs pulled back. Check whether someone can carry a tray through the opening while another person works at the counter. If the curve costs valuable storage without improving movement, daylight or interaction, retain a straight opening and place the arch elsewhere.
Approve construction and maintenance together
Before cutting a wall, confirm its structural role and the applicable sanction requirements. Permission to alter an internal finish shouldn't be treated as permission to modify structural construction. Establish responsibility for those checks before work begins.
For Kolkata, inspect for dampness, choose compatible washable finishes and keep ventilation and repair access visible in the drawings. Request an elevation and a section through the curve, not just a perspective image.
The right arch should improve the kitchen without making ordinary tasks harder. A modest tiled panel can be a better design decision than an impressive opening that compromises storage, extraction or access.
Studio Contour offers modular kitchen design, renovation planning and 3D visualisation for compact kitchens and complete homes. Visit Studio Contour to discuss your room dimensions, preferred arch shape and material options, and plan the detail alongside cabinetry, lighting and ventilation.