








Cove Lighting Ideas for New Town Apartments
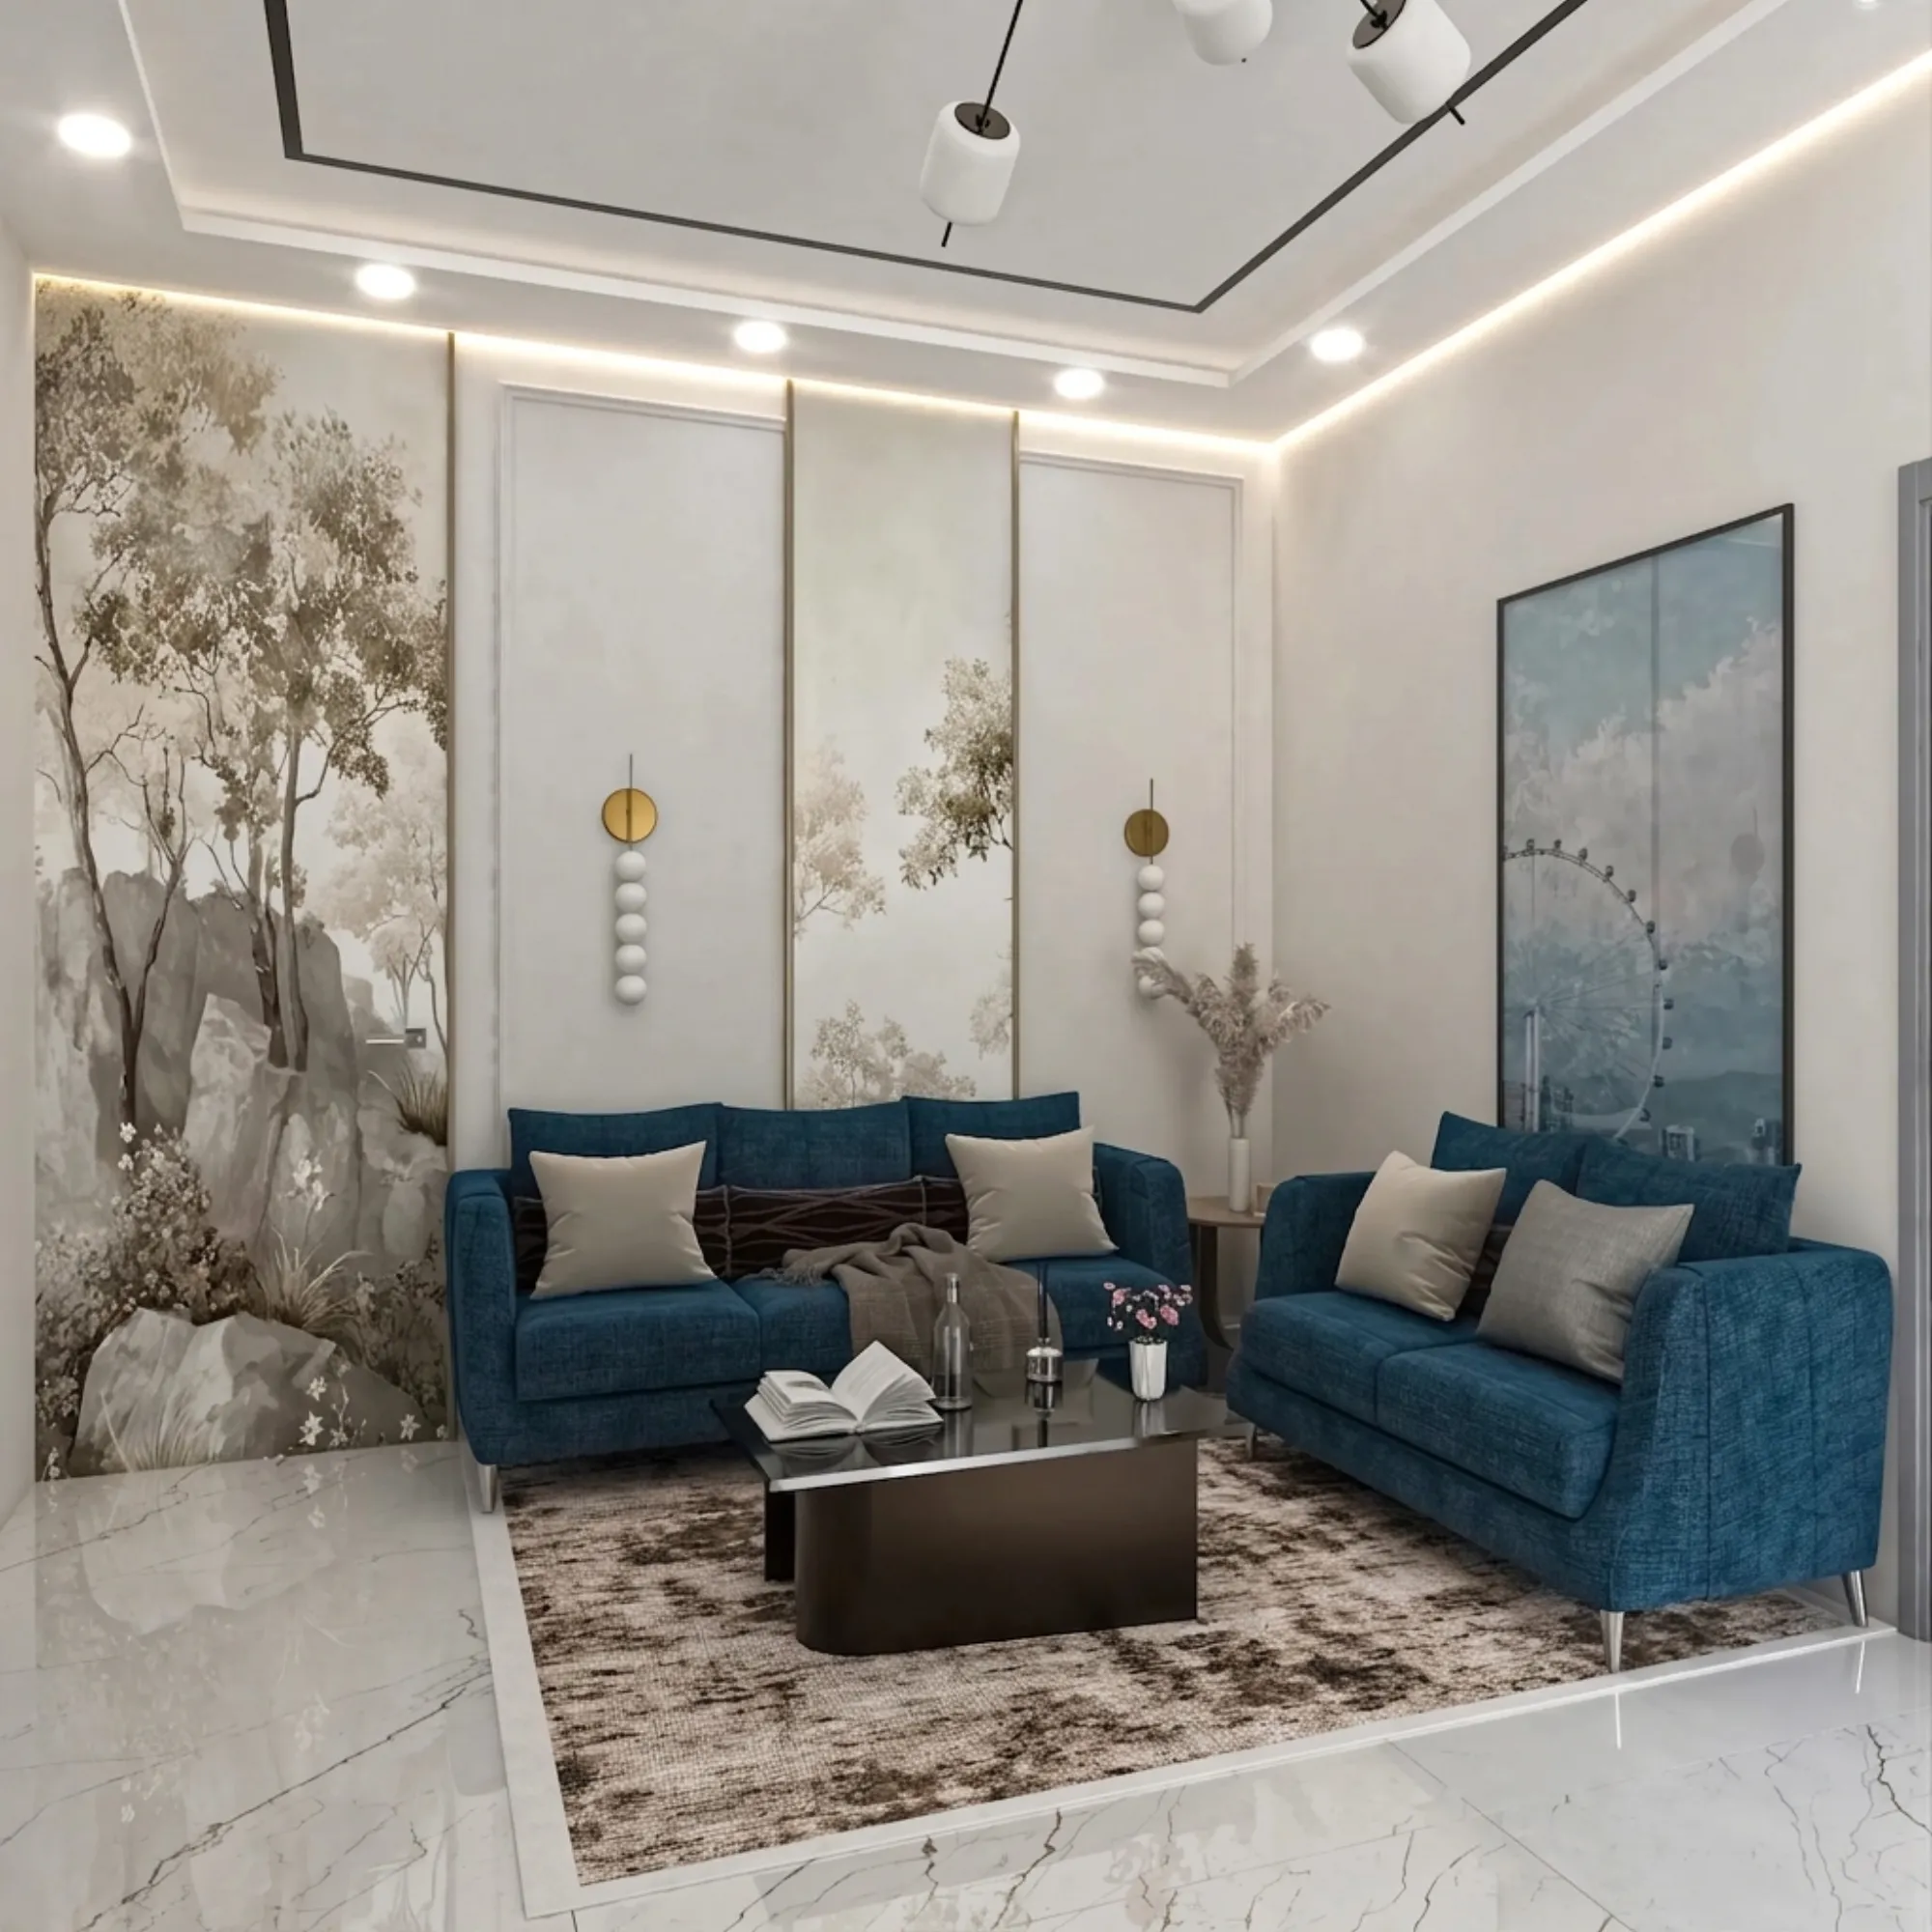
If you have walked through a few flats in New Town lately, chances are you have seen it without quite naming it: a soft band of light running along the ceiling edge, no visible bulb, just a warm glow washing up the wall and across the ceiling. That is cove lighting, and it is quietly become one of the most requested details in the interior briefs we get from clients in Action Area I, II and III. Not because it is trendy in some Pinterest sense, but because it solves a real problem that New Town apartments have, which is ceiling height that is generous by Kolkata standards but rooms that still read flat and under-lit once the sun goes down.
We have built cove lighting into more than a few of the 330+ projects we have delivered since 2014, and the pattern we see again and again is this: homeowners ask for it because a friend's flat had it and looked expensive, and then halfway through execution they realise the actual value is not the glow itself, it is what the glow does to the room, softening hard ceiling lines, hiding the mechanical bits like AC ducting and wiring, and giving you a second layer of light that does not compete with your main fixtures. This piece walks through where cove lighting actually earns its place in a New Town apartment, what to specify so it does not look like a hotel corridor, what it costs to do properly, and the questions worth asking before you hire someone to install it.
Why Cove Lighting Works Particularly Well in New Town Flats
New Town apartments, especially the newer G+3 and mid-rise stock in Action Area I and II, tend to have slightly higher slab-to-slab heights than the older Salt Lake blocks, which gives a false ceiling enough room to drop 8 to 10 inches without the room feeling squeezed. That gap is exactly what cove lighting needs, a recessed channel where the LED strip sits hidden, throwing light upward and outward rather than straight down into your eyes. In a city where summer glare is intense and monsoon skies kill natural light for weeks at a stretch, having a lighting layer that mimics daylighting rather than fighting it makes a genuine difference to how a living room feels in the evening.
The other reason it works here specifically is humidity. Kolkata's monsoon months put real stress on any electrical fitting that sits exposed, and a cove channel, done right, keeps the LED strip and driver tucked inside the false ceiling cavity away from direct moisture exposure, provided the gypsum work and the electrical routing are sealed properly at the joints. We have gone back into a few older Salt Lake flats where the cove strip failed within two monsoons because the installer used a cheap non-waterproof LED tape and ran the driver in an unventilated pocket that basically cooked itself. So the climate is a genuine reason to get this specified correctly the first time rather than treat it as decorative trim you can redo cheaply later.
Where Cove Lighting Actually Belongs in the Layout
The mistake we see most often in DIY or contractor-only jobs is cove lighting run around the entire perimeter of every room, which ends up looking like an airport lounge rather than a home. Cove works best as an accent, not a blanket treatment. In the living room, it typically sits around a central ceiling drop or a TV feature wall, giving depth to the seating zone without washing out the whole ceiling. In the master bedroom, a cove run above the bed's headboard wall, paired with a dimmer, does more for the room's mood than any pendant fixture will. Kitchens in New Town flats, especially the open-plan ones common in newer builds, generally do better with task lighting under the cabinets and a simple cove line only along one edge, if at all, since kitchens need bright even light for actual cooking, not ambience.
Balconies and puja corners are the other spots worth calling out. A slim cove line along a balcony's inner ceiling edge, especially where residents have gone in for natural ventilation with jaali or louvre screens, gives the space a finished evening look without a harsh downlight glaring off the grille. For puja units, a warm cove wash behind the shrine niche is one of the more requested details we get from clients following Vastu Shastra guidance, since it lights the space without a direct bulb positioned awkwardly over the deities. If you're weighing this against a full false ceiling and lighting design plan for the whole flat, it helps to walk the layout room by room with a designer rather than deciding fixture by fixture, because cove placement really only reads well when it is planned against the furniture layout, not against a blank ceiling.
| Cove Lighting | Standard Downlights |
|---|---|
| Ambient, indirect glow that softens the room and hides ceiling imperfections | Direct, focused light good for task areas like kitchen counters and study desks |
| Needs a false ceiling drop of 8-10 inches to install properly | Works with a flat or minimal ceiling drop |
| Best for living rooms, bedrooms, TV walls, puja niches | Best for kitchens, bathrooms, work desks, entryways |
| Higher electrical and gypsum labour cost per running foot | Lower cost per point, faster to install |
Colour Temperature, Strip Quality and the Details That Actually Matter
This is where most cove lighting jobs go wrong, and it has nothing to do with design taste. It comes down to colour temperature mismatch and cheap strip material. A living room cove run at 6500K daylight white next to a warm 3000K pendant over the dining table looks disjointed the moment both are switched on together, and yet we still see this combination in flats where the electrical contractor bought whatever LED strip was cheapest at the local shop that week. For most New Town living and dining spaces we specify warm white in the 2700K to 3000K range, moving slightly cooler to around 4000K only in kitchens and study nooks where you want more alertness in the light.
The other detail that separates a cove that looks good on day one from one that still looks good three years later is the driver and the strip's IP rating. A driver undersized for the strip length will overheat and shorten the LED's life dramatically, and this is a silent failure, you will not notice until the strip starts flickering or yellowing unevenly along its length. We always spec strips with a copper-backed PCB rather than the cheaper aluminum-tape versions for anything running longer than about 12 feet in one continuous line, since heat dissipation over a long run matters more than people expect. None of this is visible once the gypsum board goes up, which is exactly why it needs to be right before it is closed in, not fixed after.
- Confirm the false ceiling drop is at least 8-10 inches at the cove point
- Ask for the LED strip's IP rating and driver wattage in writing
- Match colour temperature across cove, downlights and pendants in the same room
- Check the driver sits in a ventilated pocket, not sealed against the slab
- Get a dimmer or scene control specified if the cove serves more than one mood
What This Costs and How Long It Takes in a New Town Flat
Cove lighting is rarely priced as a standalone line item because it is bundled into the false ceiling and electrical work, and the cost swings quite a bit depending on running length, the LED strip grade, and whether you want dimmable or colour-changeable control versus a fixed warm white. What we can say plainly is that it is not the expensive part of an interior fit-out, the gypsum ceiling work and the electrical routing around it usually cost more than the LED strip itself. For a typical 2BHK or 3BHK in New Town going in for a full residential interior design package, cove lighting across two or three rooms adds a modest slice to the overall electrical and false ceiling budget, and it is worth discussing as part of the same conversation as your cost to build a house in New Town or full interior budget rather than as an afterthought once the ceiling is already up.
On timeline, cove lighting itself does not add meaningfully to a project's duration since it runs alongside the false ceiling and electrical first-fix stages that were happening anyway. A full interior fit-out for a New Town apartment, cove lighting included, generally runs 8 to 12 weeks from design freeze to handover, and the lighting design and 3D visualization stage is where we settle the exact cove placement, so clients can actually see how the warm wash will read against their chosen wall colours and furniture before a single wire goes in.
- 01Site measure and ceiling height check
- 02Lighting layout finalised in [3D visualization and rendering](/service-pages/3d-visualization-rendering)
- 03False ceiling framing and electrical first-fix
- 04LED strip, driver and dimmer installation
- 05Gypsum closing, painting and final testing
One more thing worth flagging before you sign off on a cove plan: if you are still in the sanction or plan-approval stage for a new build rather than fitting out an existing flat, false ceiling drops and any change to slab-to-ceiling clearance should be checked against your approved plan, and it is worth a quick read through our guide to interior designer hiring in New Town if you have not yet locked in who is handling design versus who is handling the civil and NKDA side of things, since the two decisions affect each other more than most people expect.
Getting the Sequencing Right, and Who Should Actually Design This
A cove that looks convincing in a mood board photo and one that actually holds up in your specific flat are decided by two very different sets of people doing two very different jobs, and this is really the crux of why we push clients toward a single accountable design team rather than splitting lighting off to whoever the electrical contractor recommends. Our guide on whether to hire an architect or interior designer first covers this sequencing question in more depth, but for cove lighting specifically, the short version is that the false ceiling drop, the electrical point layout, and the furniture plan all need to be resolved together, because moving a sofa six inches after the ceiling is closed means your cove line is now lighting empty wall instead of the reading corner it was meant to frame. We generate a full 3D mood board before execution starts precisely so clients can catch that kind of mismatch on screen rather than in the finished room.
At the end of the day, cove lighting is a small detail with an outsized effect on how a home actually feels to live in, and it rewards the kind of careful sequencing that a full-service studio handles as one continuous process rather than a series of separate vendor handoffs. We have seen the difference play out across apartments in New Town and Salt Lake alike, most recently in a G4 apartment project in New Town where the cove work around the living and dining ceiling was planned alongside the furniture layout from day one rather than retrofitted after. If you are working through a similar brief, whether that is a single room or a full flat, get in touch with our team and we will walk your ceiling heights, your electrical layout and your furniture plan together before anything gets built, which is really the only way cove lighting ends up looking the way it did in the photo that made you want it in the first place.