








New Town Design & Architecture
Elevation Lighting Design: Making Your Facade Stand Out at Night
How buildable area, room layout, and facade materials on a typical New Town plot come together to make a home look deliberate after dark, not floodlit.
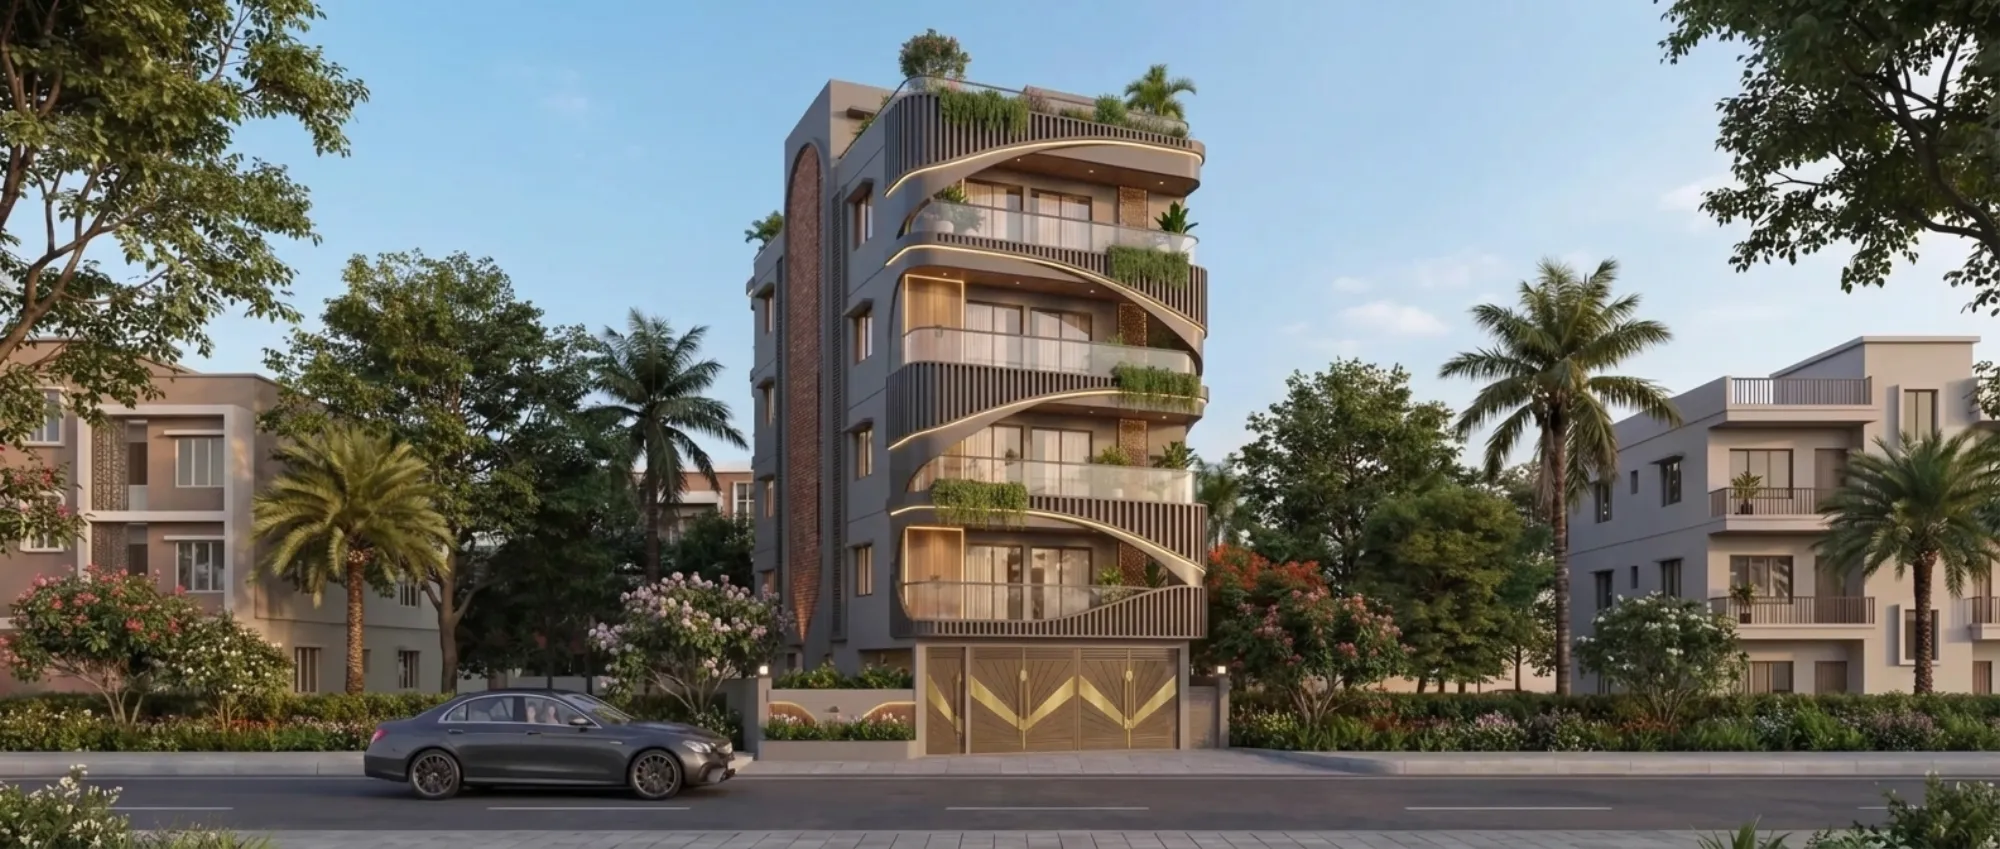
If you have ever driven through New Town after dark and noticed how some homes practically glow while the one next door disappears into the streetlight shadows, that difference is almost never about a bigger budget. It is about whether the facade was designed with light as a material from day one, or whether someone bolted a few floodlights on after the elevation was already finished and painted. We see the second scenario constantly, on 30x40 plots, on 40x60 corner sites, on duplex bungalows with a nice double-height entry that nobody thought to illuminate properly, and it is one of the most fixable regrets a homeowner brings to us after possession.
This guide is written for anyone sitting on a plot in New Town or the wider Kolkata belt, thinking through a ground-plus-two or ground-plus-three home with a contemporary or semi-contemporary facade, and wanting to understand how lighting design actually gets folded into the elevation rather than added as an afterthought. We will walk through how much building envelope a typical plot in this size range actually gives you, what that means for facade surface area and lighting zones, which elevation materials respond best to night lighting, and how we at Studio Contour sequence this into a project so the electrical conduit is in the wall before the plaster goes up, not chiselled in after.
A quick note before we go further, since this comes up in nearly every consultation. Facade lighting is cheap to plan and expensive to retrofit. A recessed step light or a cove detail costs almost nothing extra when it is part of the structural drawing, and it costs a genuine amount when someone has to cut into finished masonry or run surface conduit along a wall that was meant to look clean. So the right time to think about how your house looks at 9pm is roughly the same week you are finalising the elevation, not six months after you move in.
How much facade you actually get to work with
Before any lighting conversation makes sense, you need a rough sense of your buildable envelope, because that determines how much wall surface, how many recesses, parapets, and balcony undersides you actually have to light. Under New Town, Kolkata development norms as administered by NKDA, buildable potential is governed by floor area ratio and ground coverage limits that vary by plot size, road width, and zone classification, and these numbers get revised periodically, so treat anything below as an indicative worked example rather than a figure to build against.
Take a fairly common 30x40 plot, which works out to 1,200 square feet of land. If ground coverage for that category comes in around 55 to 60 percent indicatively, you are looking at a ground floor footprint in the range of 660 to 720 square feet, and if the applicable FAR indicatively allows something like 2 to 2.5 times the plot area as total buildable floor space, that gives you a rough total of 2,400 to 3,000 square feet spread across a ground floor plus one or two upper levels, depending on how the setbacks and height rules stack up for that particular zone. The catch here is that these percentages shift depending on whether your plot fronts a wide road or a narrow internal lane, whether it falls in a specific action area, and whether recent amendments have changed the base numbers, so the one non-negotiable step is confirming current figures directly with NKDA, or with KMC or Bidhannagar authorities if your plot falls under their jurisdiction, before you lock any design. Our FAR and ground coverage guide for New Town and our broader KMC building rules overview both go deeper into how these calculations typically work, though again, always verify against the current notification.
What this buildable envelope gives you, for lighting purposes, is basically three lighting zones on a typical G+2 home: the ground floor facade including the entry portico, the first and second floor elevation faces including balconies and jaali or louvre screens, and the roof line or parapet edge. Each of these behaves differently at night, and each needs a different fixture strategy, which is why a single string of floodlights aimed up at the whole building almost always looks flat and a little desperate rather than considered.
Room layout options that actually shape how the facade reads at night
Interior layout and facade lighting are more connected than most people expect, because the rooms that sit behind a glazed or louvred elevation determine how much warm light spills outward naturally, without you having to add a single external fixture. On a 30x40 to 40x60 plot with a G+2 or duplex configuration, we typically see homeowners land on one of a few workable layouts. A living-dining-kitchen arrangement on the ground floor with a full-height glazed frontage lets the interior lighting do double duty as facade lighting after dusk, which is a genuinely efficient way to make a home look inhabited and warm rather than lit-up-for-show. Bedrooms on the upper floors, set back slightly behind balconies or vertical louvres, read as softer and more textured at night because the light filters through the screen rather than beaming directly outward.
For a 3BHK or 4BHK duplex on the larger end of this range, we often place a double-height stairwell or a central light well along the front facade, and this becomes one of the single highest-impact lighting features in the whole house, because a well-lit vertical shaft is visible from the street in a way a single window never is. If Vastu alignment matters to your family, and for most homes in this belt it genuinely does, the good news is that facade lighting placement rarely conflicts with Vastu Shastra room positioning, since lighting is a surface and fixture decision layered onto whatever room plan already satisfies the directional requirements. Our Vastu-compliant design service and our dedicated Vastu-NKDA compliant home guide for New Town cover how we reconcile the two.
| Lighting Approach | Best Suited For |
|---|---|
| Cove or recessed strip lighting | Parapet edges, balcony undersides, jaali screens |
| Grazing wall wash | Textured stone or exposed brick facades |
| Uplighting on columns or pillars | Portico entries, double-height frontages |
| Interior spill through glazing | Living/dining zones facing the street |
Elevation style and material choices that respond well to night lighting
Not every facade material behaves the same way once the sun goes down, and this is genuinely one of the more overlooked decisions in the whole process. Smooth painted plaster looks fine in daylight but tends to look flat and slightly washed out under floodlighting, because there is no texture for the light to catch. Textured [engineered stone](https://en.wikipedia.org/wiki/engineered stone) cladding, exposed board-formed reinforced concrete, and vertical timber-look louvres all read dramatically better at night, because a grazing light source set close to the surface throws shadow lines across the texture and gives the wall visible depth instead of a uniform glow.
Glazed frontages, whether a straightforward large-format window or a proper curtain wall system on a bigger 40x60 plot, are almost self-lighting once the interior lights are on, and they benefit from restraint outside rather than added floodlighting, since too much external light on glass just creates glare and washes out the warm interior glow you actually want people to see. Jaali and louvre screens, popular across a lot of our New Town and Salt Lake projects, are probably the single best facade element for lighting drama, because a light source placed behind or beneath the screen throws a shifting pattern outward that changes with the angle you view it from, and this costs very little extra once the screen structure itself is already being built.
One more practical point worth flagging here, since it comes up on almost every larger project. Deep overhangs, balconies, and covered porticos that support [passive cooling](https://en.wikipedia.org/wiki/passive cooling) and shade the facade from harsh afternoon sun also happen to create excellent recessed lighting opportunities underneath, so a design decision made for daytime thermal comfort ends up paying off again after dark. It is one of the small ways that good [natural ventilation](https://en.wikipedia.org/wiki/natural ventilation) thinking and good night lighting thinking end up reinforcing each other rather than competing for the same wall surface.
How we actually approach this at Studio Contour
When a lighting-conscious elevation is part of the brief, and increasingly it is, we build it into the process from the concept stage rather than treating it as a finishing touch. The sequence we follow on most residential projects in the 1,200 to 2,400 square foot buildable range looks roughly like this, and it holds whether the client came to us with a bare plot or an existing structure they want to reface.
- 01Confirm plot rules with NKDA/KMC
- 02Finalise elevation style and material palette
- 03Map lighting zones onto the facade drawing
- 04Run conduit and junction points before plastering
- 05Test fixtures on-site before final fixing
We start by getting the buildable parameters confirmed with the relevant authority, because the elevation cannot be finalised until the massing is locked. From there our team develops the elevation style, whether that leans contemporary with clean planes and a stone accent wall, or a warmer semi-traditional look with jaali screens and a pitched portico, and we run every option through a 3D visualization and rendering pass with the lighting switched on, because a facade that looks good in flat daytime render can still fall apart at night, and the only honest way to catch that is to render it dark and light it properly before anyone commits. Once the material and lighting zones are agreed, our site team coordinates with the electrical contractor to route conduit and junction boxes into the wall sections before plastering begins, which is the single step that prevents the retrofit headache we mentioned earlier. A recent example of this approach in practice is our Street 542 residence in New Town, where the layered facade lighting was drawn into the structural plan from the earliest design stage rather than added afterward.
- Confirm current FAR and ground coverage with NKDA/KMC before finalising elevation
- Choose facade materials with texture, not just flat paint, since texture is what light grazes against
- Plan conduit and junction boxes into the wall before plastering, not after
- Balance interior spill lighting with restrained external fixtures on glazed sections
- Test actual fixtures on-site at night before final fixing, since renders never fully predict real conditions
Budget is the other question that comes up constantly, and reasonably so, since facade lighting sits inside a much larger construction cost. If you want a fuller sense of what a project like this runs in New Town specifically, our cost to build a house in New Town guide breaks down where the money typically goes, and for a size-specific reference our 40x60 plot New Town home design blog walks through a layout closer to the larger end of what we have discussed here. If your plot leans toward a duplex configuration specifically, our duplex house design guide for New Town is worth reading alongside this one, since duplex facades tend to have that double-height zone we mentioned as a natural lighting anchor.
At the end of the day, a facade that looks considered after dark is rarely the most expensive option on the table, it is the one where lighting was treated as part of the architecture rather than a separate line item handed to an electrician in the last week of finishing. If you are working through a plot in New Town or Kolkata right now and want to get the elevation, the room layout behind it, and the lighting plan aligned from the start, get in touch with our team and we can walk through your specific plot and what it can realistically support.